How do you make a Burning Bridges AI video?
On burningbridges-ai.com, upload one lead photo, optionally add up to five supporting photos, confirm your photo permissions, and sign in to generate. The performance and prompt are already provided. The current preset produces a 29-second, 720p landscape video with the reference soundtrack. Review the full result, then select Download MP4 with Sound.
Before you start
This guide covers the fixed Burning Bridges performance on Burning Bridges AI. It is a reference-guided character edit, rather than an open text-to-video request. You do not need to find a video clip or write a motion prompt.
- One lead photo: a sharp, evenly lit image of one adult, with the face unobstructed and the upper body visible.
- Optional cast photos: one person per image, for up to five supporting roles.
- Accepted files: JPG, PNG, or WebP, no larger than 10 MB each. Each image side must be between 240 and 8,000 pixels.
- An account and an available video allowance or sufficient credits: confirm your current entitlement before submitting.
- Photo permissions: you must be 18+ and have each adult’s consent for AI processing and your intended use.
Availability at the time of this walkthrough: new video-pack purchases are not yet available. You can preview the performance and prepare your cast; generation requires an existing eligible balance or allowance. Check the current pricing and availability.
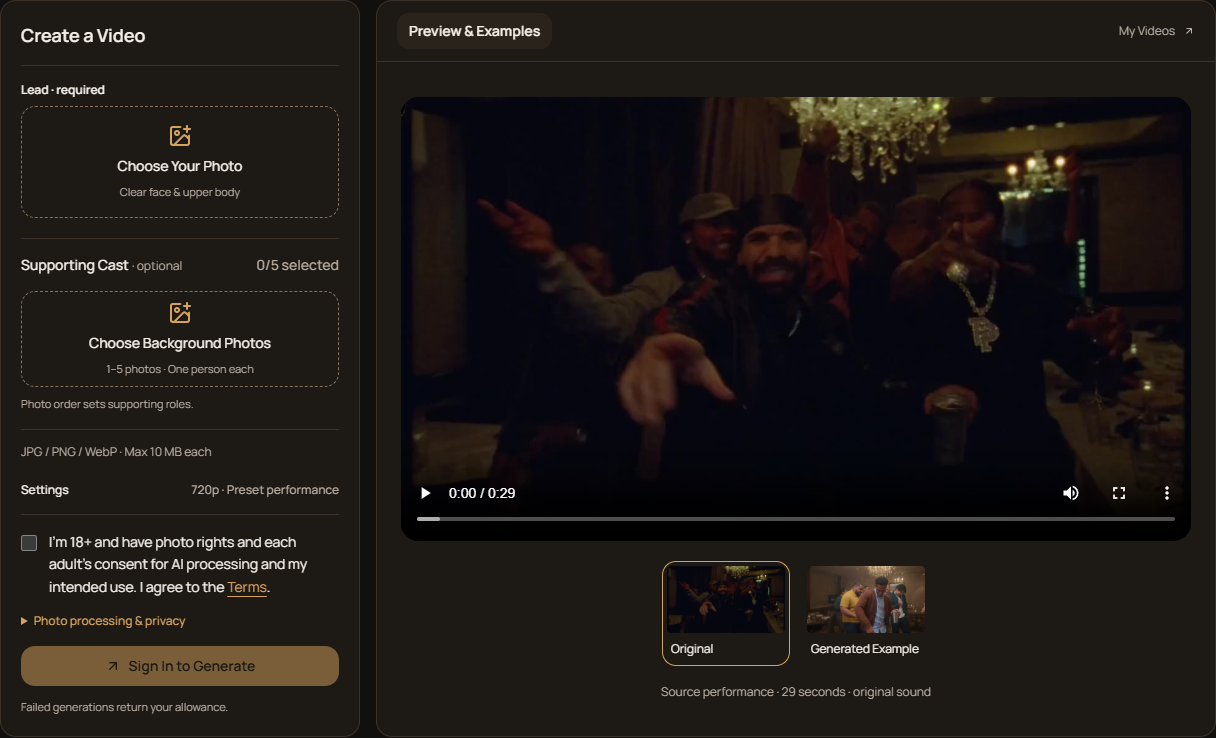
1. Upload your lead photo
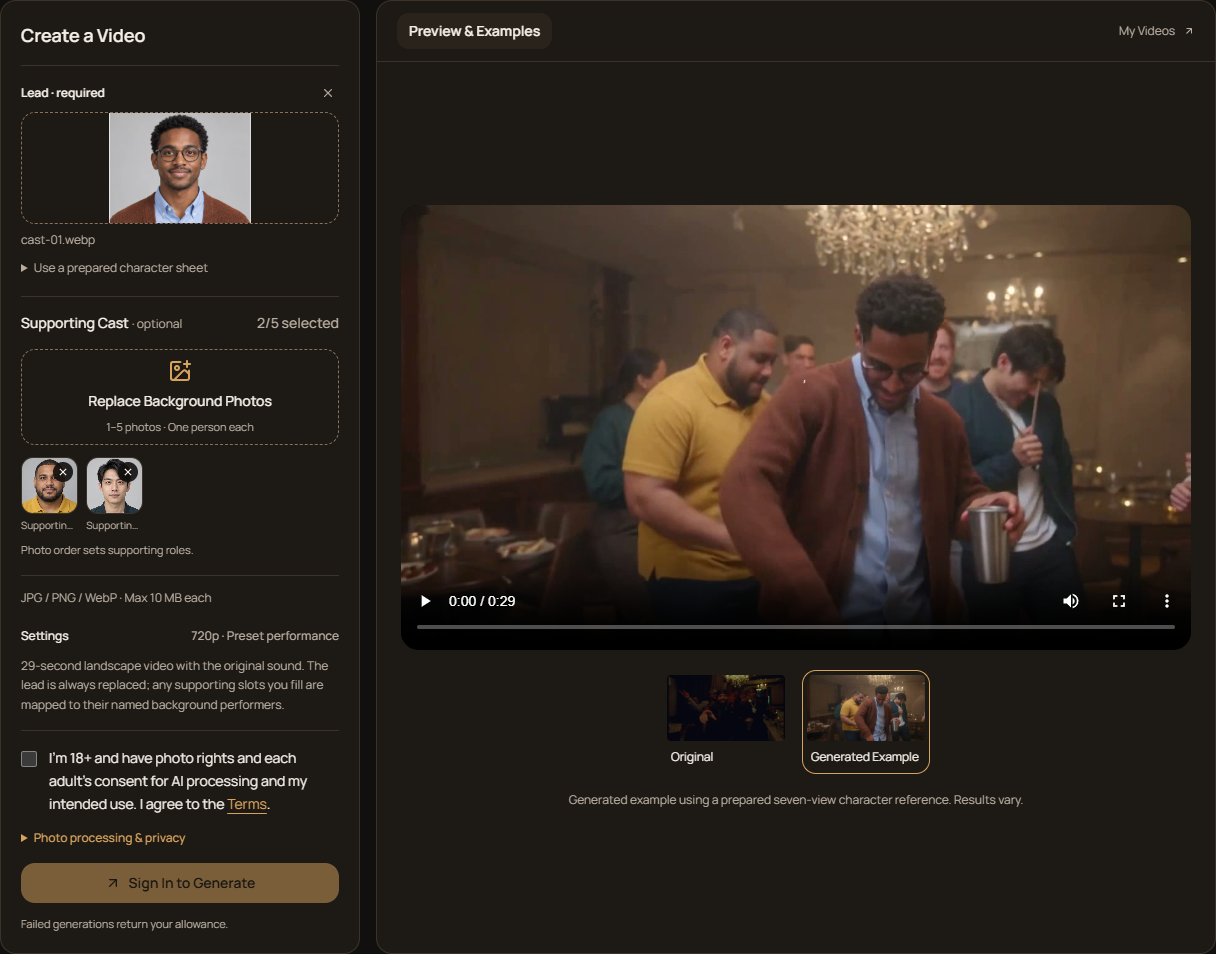
Select Choose Your Photo under Lead · required and choose an image from your device. The lead is the foreground performer holding the silver cup. Your selected image appears in the upload box with its filename underneath.
Choose a photo that shows the appearance you want in the video: face, hair, glasses, clothing, and upper body. A group shot leaves the intended identity ambiguous; a heavily filtered or tightly cropped face gives less information about the rest of the person.
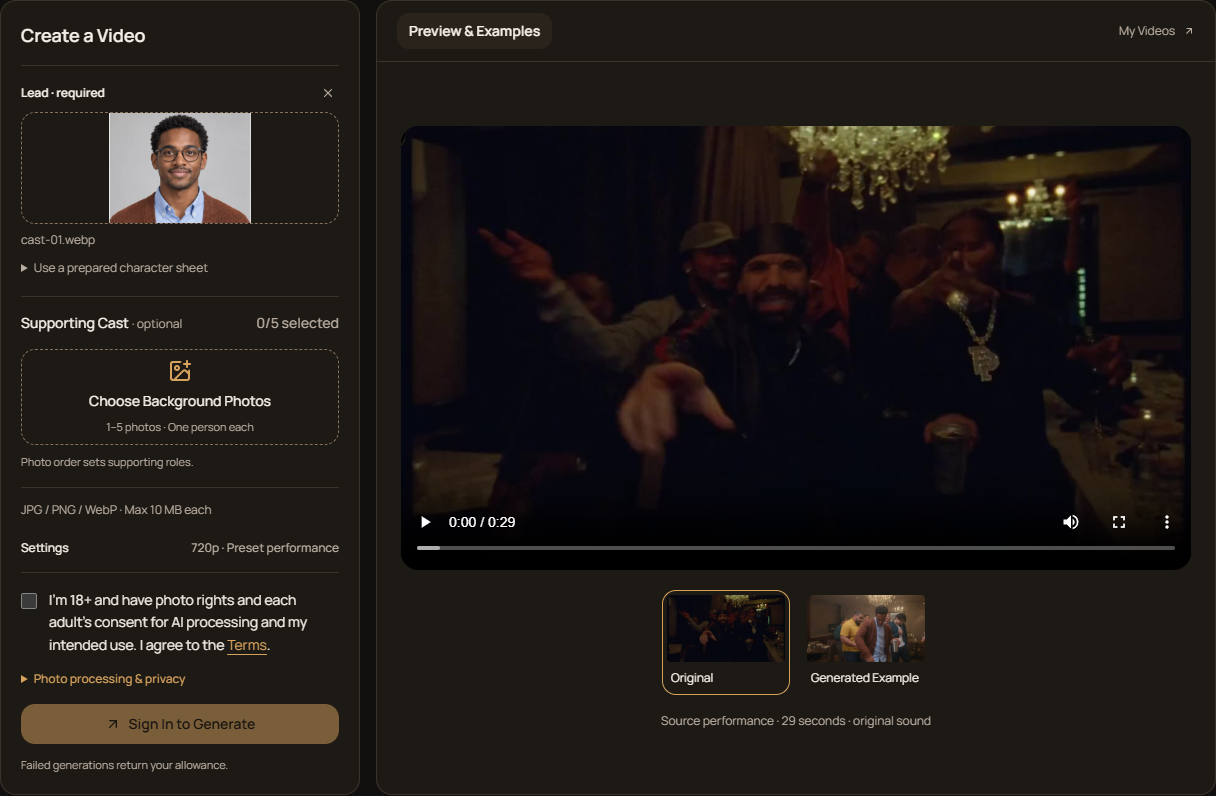
Do you need a seven-view character sheet?
No. For a normal photo, leave Use a prepared character sheet unchanged: the workflow prepares the reference automatically. Only select Already a seven-view sheet if your file actually contains three face close-ups and four full-body views of the same person. A normal portrait is not a seven-view sheet.
2. Choose your supporting cast
For a lead-only version, leave Supporting Cast empty. To introduce other people, select Choose Background Photos and add up to five separate images. The order assigns each photo to a named supporting role; these are not five interchangeable crowd slots.
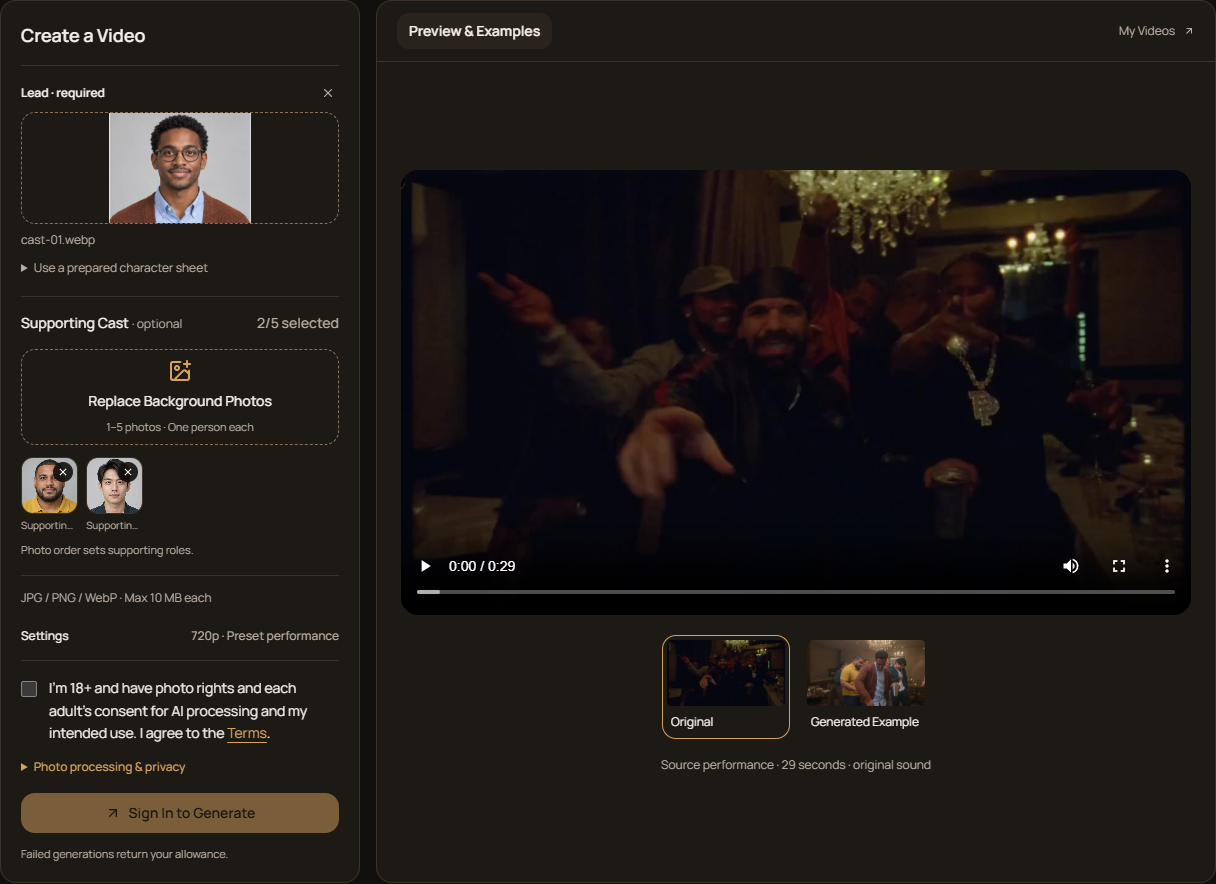
| Photo slot | Reference performer |
|---|---|
| Supporting 1 | Black knit cap · starts behind the lead on the left |
| Supporting 2 | Beige bucket hat · starts behind the lead on the right |
| Supporting 3 | Black T-shirt · large pendant chain |
| Supporting 4 | Red hoodie and cap · rear center |
| Supporting 5 | Bareheaded dark top · far left near the end |
Start with the smallest cast that tells your idea. The mapping instructs the model which performer to replace, but overlapping people, turns, and hidden faces can still cause identities or clothing to mix. Adding more photos does not guarantee that every replacement stays correct.
3. Review settings and consent
Open Settings. The current preset is fixed at 29 seconds, 720p, landscape 16:9, with the original soundtrack. There is no duration, resolution, aspect-ratio, or custom-prompt selector in this workflow.
Read the photo-permission statement and check the box only if it applies to all your inputs. The button remains disabled until a lead image and the required confirmation are present. The Photo processing & privacy section links to the details of third-party AI processing and storage.
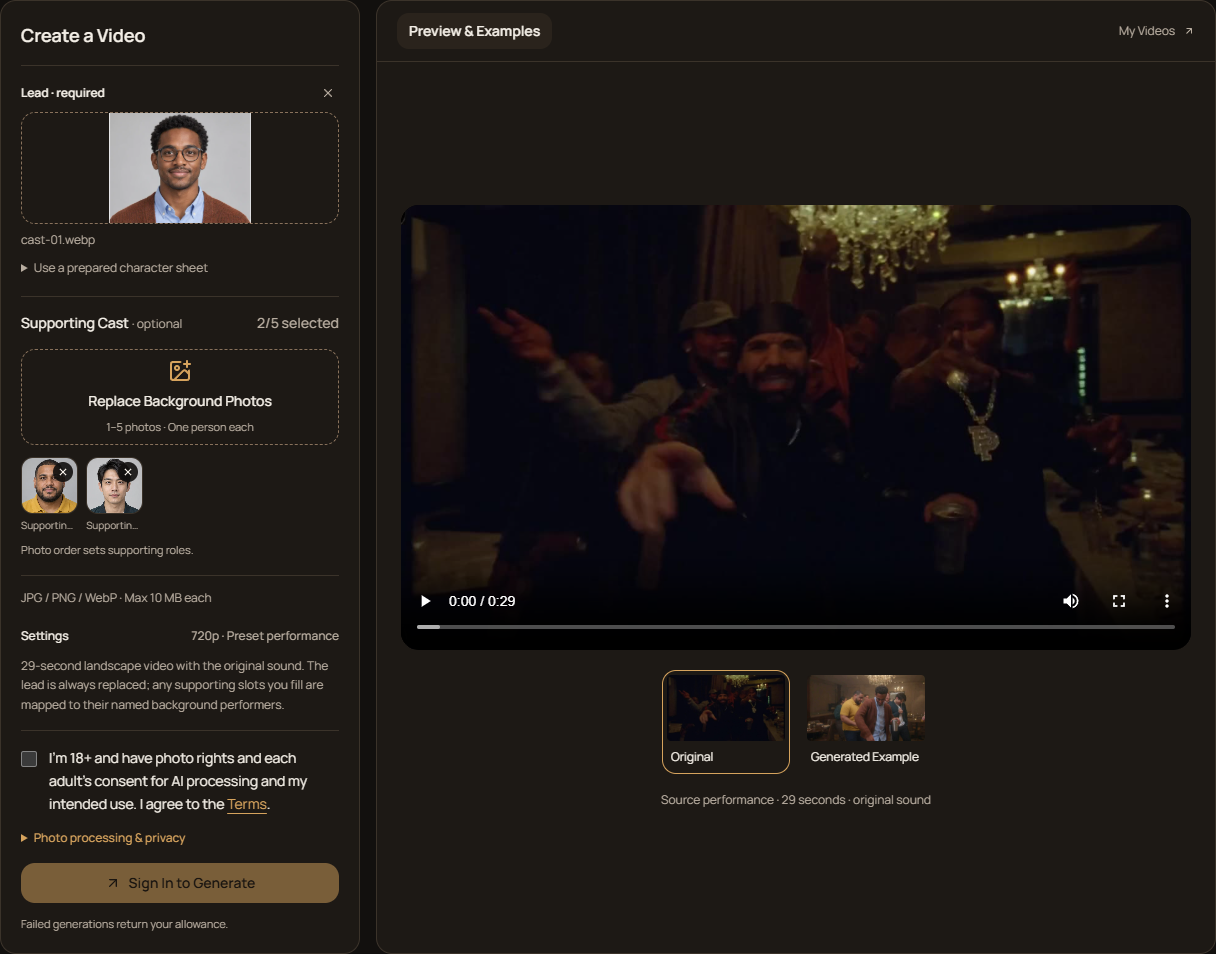
Check Videos & orders after signing in to confirm your balance or allowance. Do not assume that creating an account includes enough credits for this video. Any new generation is a separate request; see the refund policy for purchase refunds.
4. Sign in and generate
Select Sign In to Generate if you are signed out. Complete sign-in, return to the generator, and recheck your selected files and permissions. When signed in, the submission button reads Generate Video. Select it once to submit the request.
The task panel reports progress through character preparation, video creation, performance synchronization, and final checking and saving. These stages update as processing finishes; they do not provide a guaranteed completion time.
- Prepare your character: create the references from ordinary photos.
- Create the video: generate and assemble the performance.
- Synchronize the performance: process the lead performance with the audio.
- Check every frame and save: finish the output before making it available.
If the task is still processing, check the saved task rather than submitting another copy. Returning to the generator can restore the account’s saved task; My Videos opens your creation history. Read any failure message before trying again.
The screenshots in this guide stop before a generation is submitted. No processing or completed-task screen has been fabricated, and this walkthrough does not claim a measured end-to-end generation time.
5. Review the full video and download it
When the task says Your video is ready, play your completed video from beginning to end. The download action is Download MP4 with Sound. Save the file to your device, then open the downloaded MP4 to confirm both picture and audio.
- Identity: check the face after turning away or being covered, not only in the first frame.
- Hands and cup: look for changing fingers, unstable grip, and floating or changing props.
- Supporting cast: check that each character stays with the intended performer as people cross.
- Continuity: watch for a change in appearance or a jump in the middle of the performance.
- Sound: listen to the actual download. A soundtrack does not establish perfect lip synchronization.
Use the expiry date shown with your completed task and download before it expires. The current interface states that videos are stored for three calendar months. See the Privacy Policy for storage details.
6. Prepare your post
The downloaded video is landscape. To make a vertical edit, use a video editor to crop or place it on a 9:16 canvas. Preview the entire edit: a center crop can cut off the cup, hands, or supporting people when the camera moves.
The preset already includes sound. Listen before adding another track so that you do not unintentionally double the audio. Check the destination platform’s current AI-disclosure and music-use rules for your account and intended use, and describe the video as an AI edit rather than real footage of the person in the scene.
Being able to generate and download a video does not grant rights to every person, character, soundtrack, or reference depicted. Use material you have permission to use and review the Terms before posting.
Walkthrough notes and sources
We captured these screenshots from the Burning Bridges AI interface on October 11, 2026. The preparation steps use fictional character images already available in the site’s example cast. The playable sample was made separately using prepared character references; its inputs and processing differ from a fresh ordinary-photo submission.
This is a first-party guide to burningbridges-ai.com. Other tools using the Burning Bridges name may have different workflows, output lengths, sound handling, and prices. Burnin’ Bridges AI Music is also a separate music project, rather than this video generator.
- Current generator and preset — source for the controls and steps shown here.
- Example inputs and complete sample — inspect the provided output.
- Pricing and availability — check current purchasing options.
- Starrd’s Burning Bridges guide — an alternative template and DIY workflow; its settings do not apply to this site.
- Burnin’ Bridges AI Music — the separate music project.
Prepare your Burning Bridges cast
Open the preset, preview the performance, and choose one clear lead photo to start.
Open the generator